How to Configure Availabile Warehouses in DataPancake
Build a script to configure virtual warehouse access for DataPancake by granting usage on existing warehouses or provisioning new, optimized warehouses for scanning and discovery workloads.
1. Navigate to the "Admin" script builder

2. Enter the role name used to install DataPancake

3. Enter a role name with privileges to create a warehouse

4. Enter the warehouse name used to execute the generated script

5. Determine which warehouse sizes to include in the script
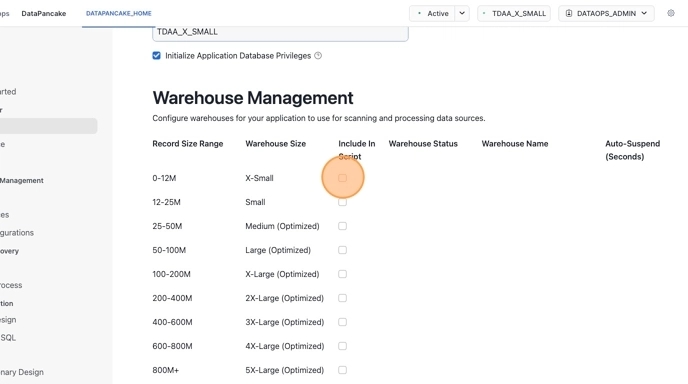
6. Set the warehouse statuses
Create New will create a new warehouse and add it to DataPancake
Use Existing will add an existing warehouse to DataPancake

7. Enter warehouse names
Enter warehouse names for existing warehouses or enter a custom name if you are creating a new warehouse

8. (Optional) Modify the Auto-Suspend time

9. Click "Generate Script"

10. Copy the script

11. Open a new snowflake worksheet and paste in the script

12. Review & Execute the script
Use the blue dropdown arrow at the top right and click "Run All"

13. Ensure successful execution by examining the call result column in the result set

Troubleshooting
The query may take several minutes to finish.
If Snowflake fails to provision any of the larger warehouses, simply refresh the page and re-execute the required statements.

Last updated
Was this helpful?